Creating custom fields in Sage Intacct

Sage Intacct custom fields provide businesses with the flexibility to customize their ERP system to meet unique requirements. Often overlooked, this feature allows you to track and manage information relevant to your business that isn’t available in standard fields. In this guide, we’ll explore what custom fields are, why they’re valuable, and explain step-by-step how to create them.
What are custom fields?
Custom fields enable you to customize the data you track in Sage Intacct across nearly any object in the system. Whether it’s vendor records, contracts, or property details, custom fields provide the flexibility to store and access the information that’s most important to your business.
Why use custom fields?
Custom fields eliminate the need to dig through paper files or external spreadsheets to find critical information. Custom fields allow you to centralize data including:
- Contract expiration dates for vendors or customers
- Parcel numbers for properties
- Rent amounts and payment schedules for tenants
- License numbers for drivers
There are a wide range of options, making custom fields a powerful tool for streamlining your operations.
Types of custom fields
Sage Intacct offers various data types for custom fields, including:
- Checkboxes for yes/no options
- Dates for tracking deadlines or expirations
- Text fields for policy numbers or other details
- Picklists for predefined options
- Multi-select picklists for choosing multiple values
This flexibility ensures you can design fields that fit your specific needs.
Featured Video
Creating custom fields in Sage Intacct
Custom fields in Sage Intacct empower businesses to tailor their ERP system to unique needs, enabling streamlined operations and data management. Learn how to create and apply them effectively to enhance your processes.

How to create a custom field in Sage Intacct
Navigate to the Applications menu in Sage Intacct. Depending on your setup, select either the “Customization Services” or “Platform Services” tab. From there, go to “Object Customizations” and select “Custom Fields.”

Step 1. Choose the object
Decide which object you want to customize. For example, you might add a custom field to vendor records, AP bills, or dimensions like departments.

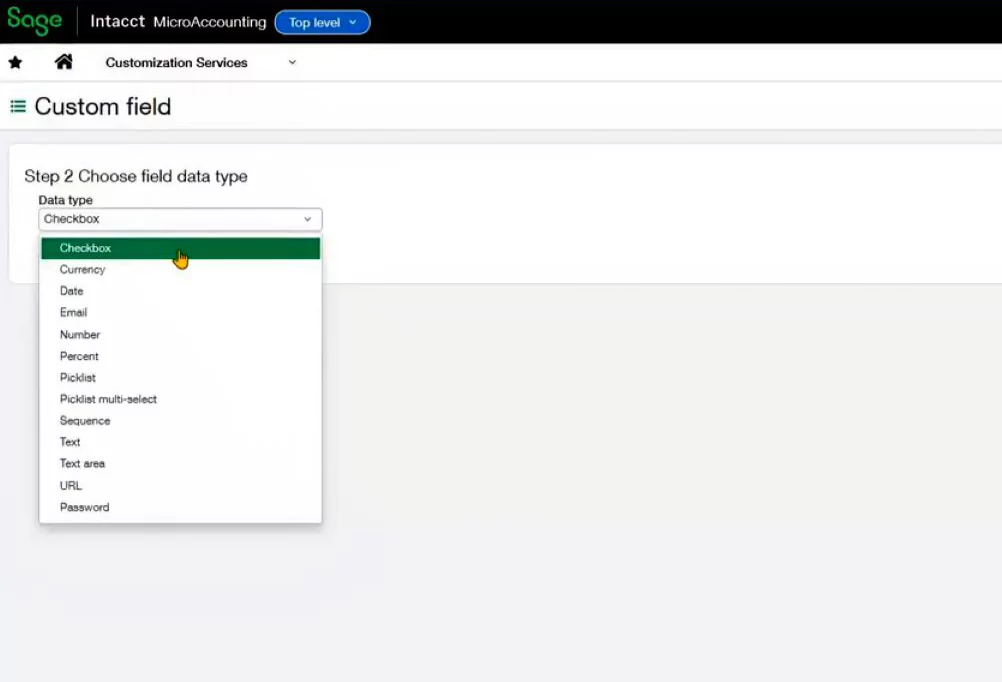
Step 2. Select the data type
Choose the type of data you want to track. For instance, a text field might be ideal for contract expiration dates, while a checkbox could work for simple yes/no options.
Step 3. Label and configure the field
Give your field a clear label, such as “Contract Expiration Date.” Sage Intacct will automatically generate a field ID, which is useful for importing data. You can also add an internal description for clarity.

Step 4. Set deployment options
Decide if the field is required, hidden, or inactive. Then, specify where the field will appear, such as the “Vendor” tab under “Primary Contact Information.”
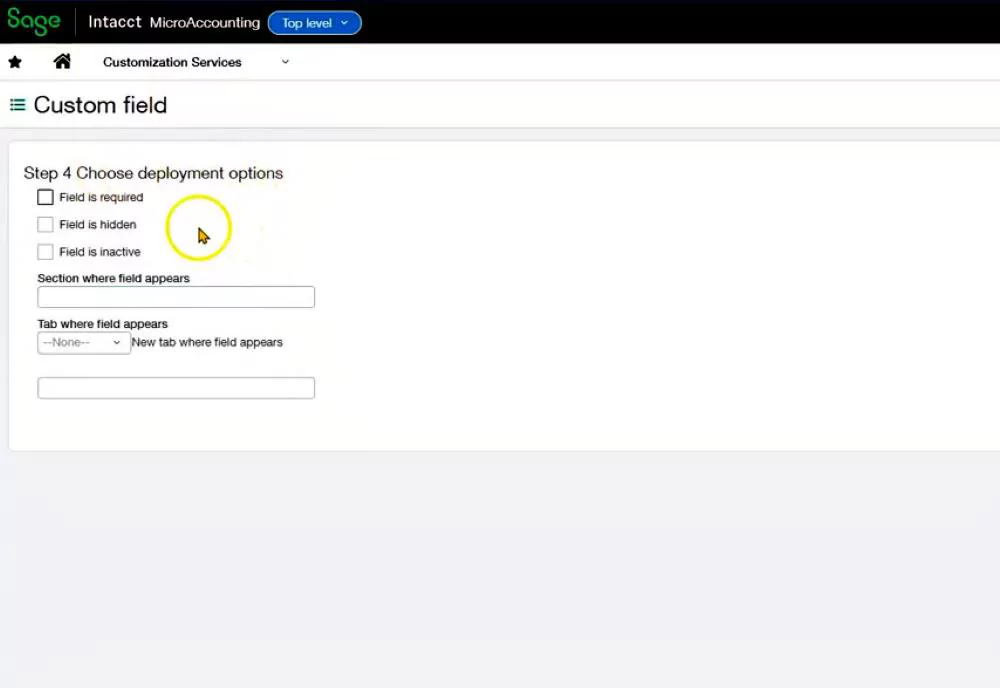
Once you’ve completed these steps, click “Done” to save your custom field. It will now be available for use across your organization.
How to apply custom fields
Custom fields can be used in many ways to enhance your Sage Intacct experience:
- Tracking policy numbers and expiration dates for insurance
- Managing rent amounts and due dates for properties
- Storing license numbers for drivers
- Recording parcel numbers for owned properties
These fields not only centralize your data but also make it easier to generate reports and gain insights.
Conclusion
Custom fields in Sage Intacct offer unmatched flexibility for tailoring your ERP system to your business needs. By following the steps outlined above, you can create fields that streamline your operations and improve data accessibility.
Rand Group’s Sage Intacct customization and development services can help enhance your business processes and improve efficiency. Contact us to speak to an expert.