Dynamics 365
 Power Platform
 Dynamics
Learn how to customize your Business Central reports using Microsoft Word

Customized reports provide tremendous benefits to organizations and are incredibly useful for interpreting data from raw, meaningless numbers to productive, valuable information. While Business Central has a good amount of pre-defined reports that are available, it may be beneficial for your organization to tailor these reports to meet your specific needs. In this post, we will show you how to build custom reports for Business Central using Microsoft Word.
Customizing your Business Central reports
Business Central’s default reports have a built-in layout, which can either be RDLC, Word, or both. Users cannot modify these built-in layouts. However, you can create your own custom report layouts for the same reports. After you create the layout, you can export your report to Microsoft Word, make edits, and then reimport it for use.
Create your custom report layout
Before any customizations can be made, a custom form must be created from a built-in layout. Once the custom report layout has been created, you will be able to start the customization process by exporting the layout to Word.
To do this, open Business Central and follow the steps below:
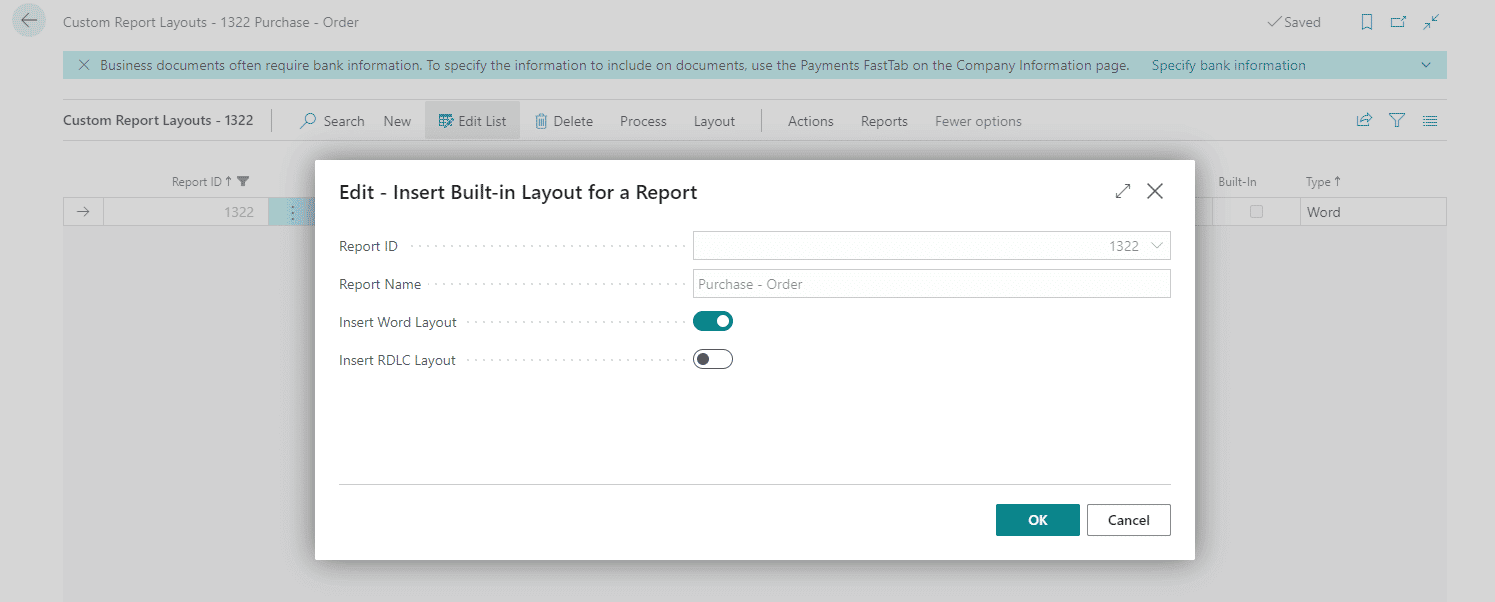
- Use the search feature to search for and select Report Layout Selection
- Select the report layout you want to customize
- Select Custom Layouts >> New
- Toggle Insert Word Layout
- Select OK
Now, you can export your layout:
- Select the custom report layout you just created
- Select Layout >> Export Layout
The Report Layout will automatically be downloaded to a Word document.
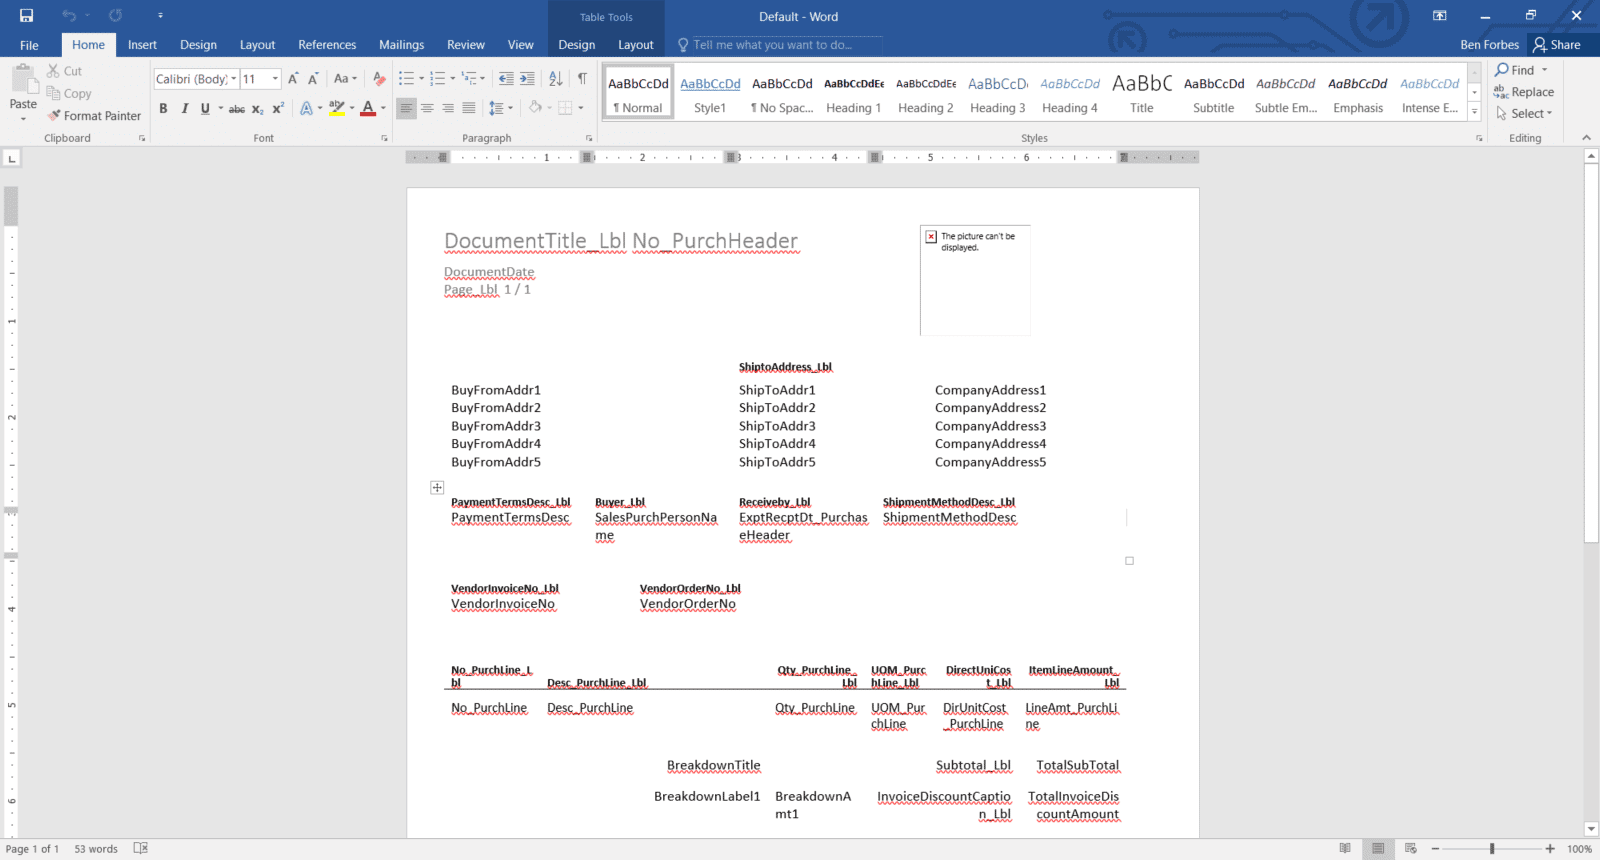
Customize your report in Microsoft Word
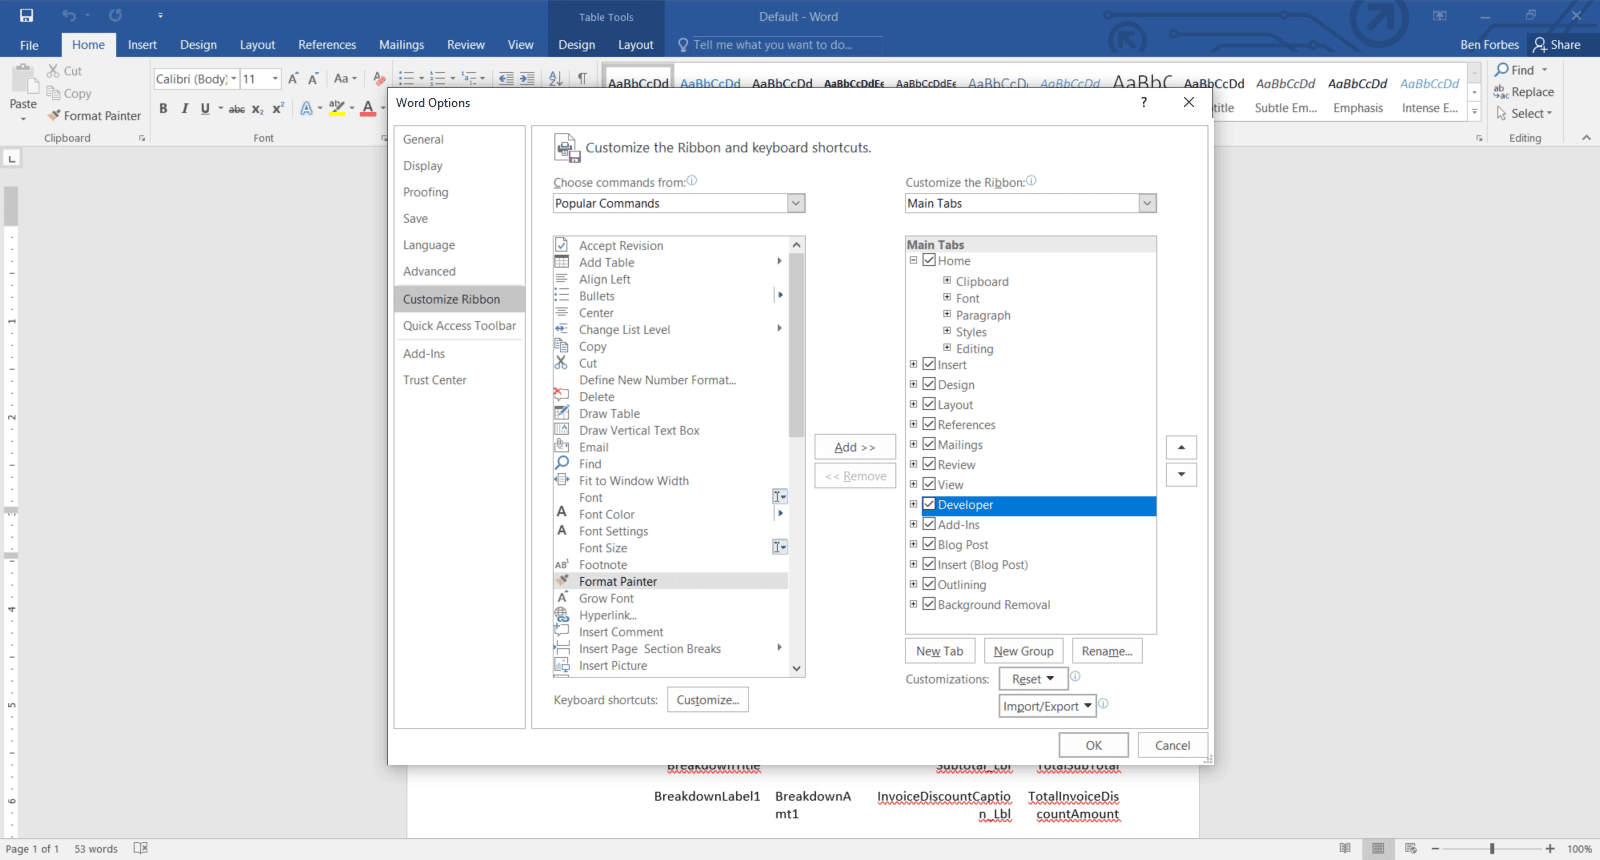
Once you have the Report Layout open in Word, there are a couple of steps you can take to help you efficiently customize the report. First, you will need to enable the Developer tab. If the Developer tab is not visible in the ribbon, follow the steps below:
- Select File >> Options
- Select Customize Ribbon
- Check the Developer box
- Select OK
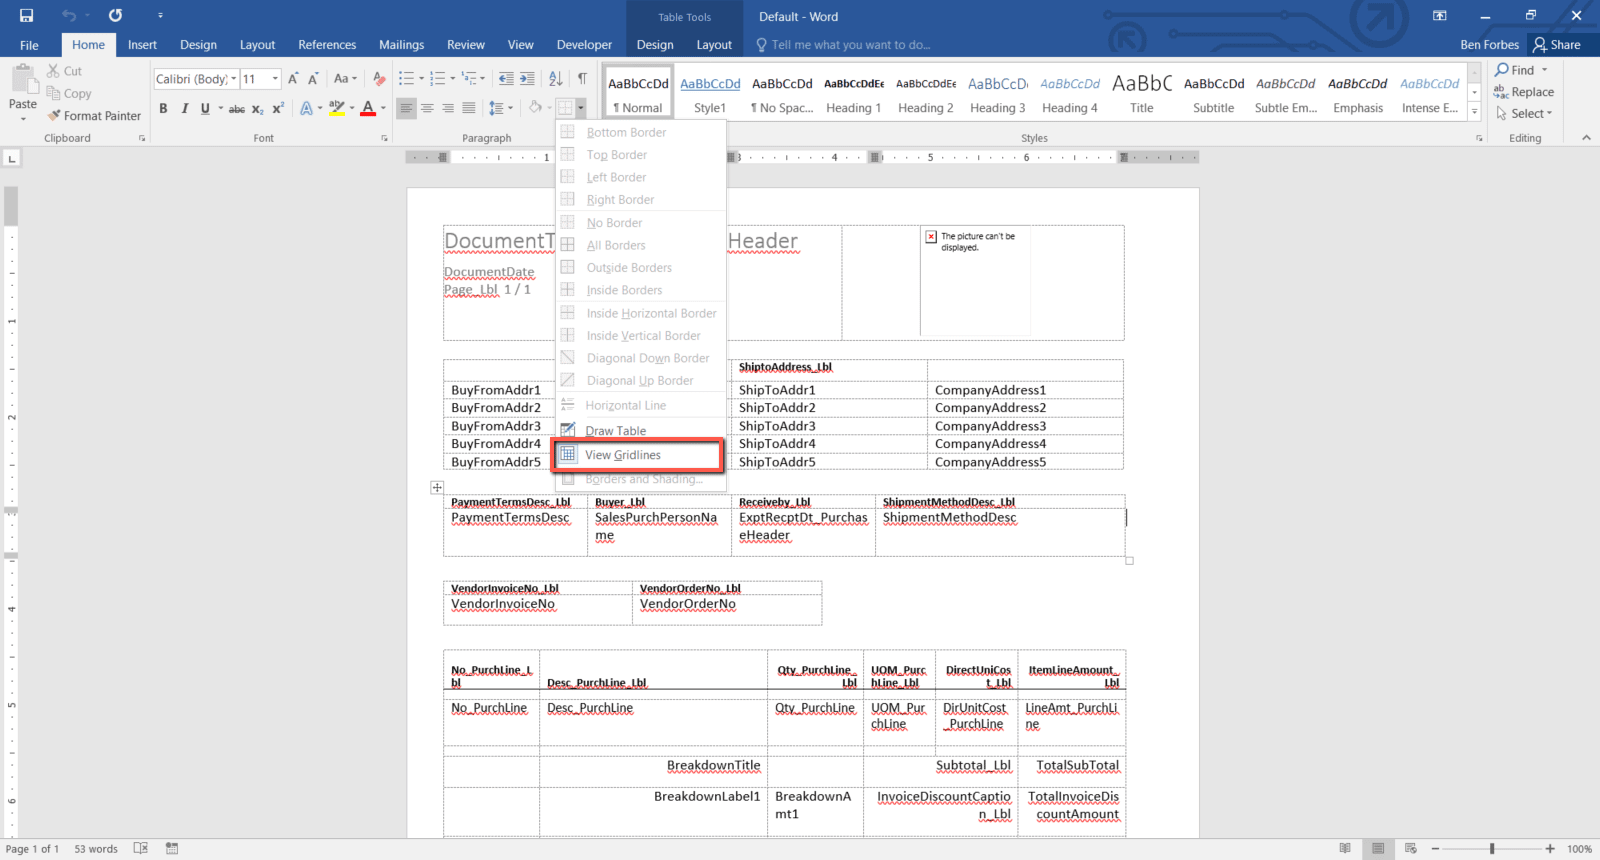
After the Developer Tab has been added to the ribbon, it may be beneficial to turn on grid lines. Gridlines will help you visualize where information is going to be displayed on the document. To enable gridlines, follow the steps below:
- Select the Home tab
- In the Paragraph section click the Borders drop-down menu
- Select View Gridlines
Once these steps have been completed, you will able to start editing the report. You can make general formatting and layout changes, as you would do with any other Word document.
Use XML to make advanced customizations
If you would like to make more advanced edits to your custom report, you can use the XML Mapping Pane. To use the XML Mapping Pane, follow the steps below:
- Select the Developer tab
- Select XML Mapping Pane
- Select the drop-down menu
- Choose the XML starting with urn
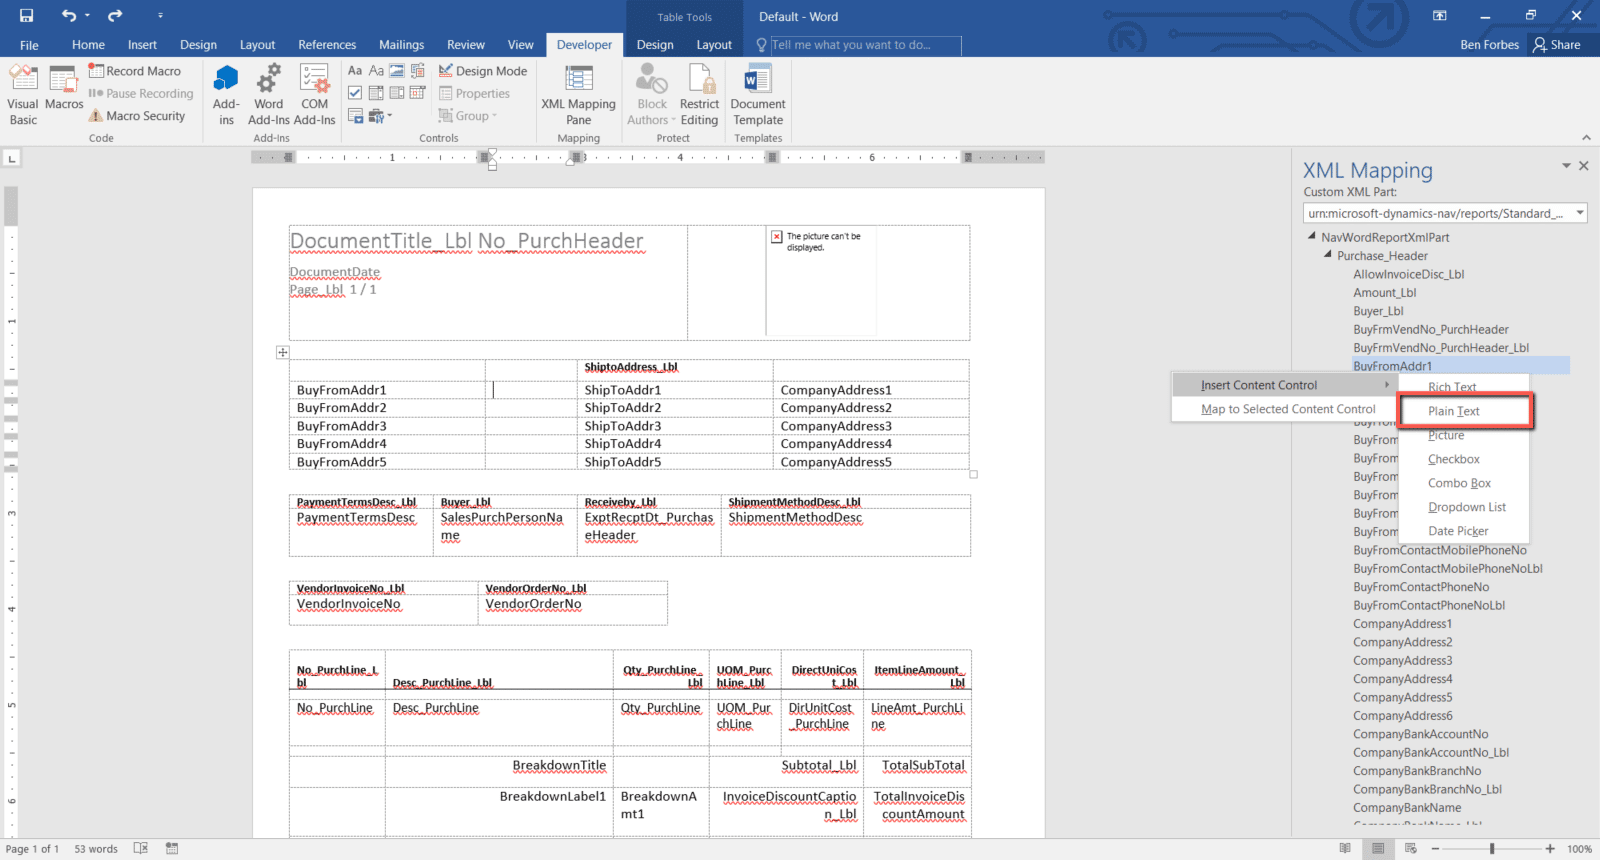
You will notice that there are several built-in fields and labels that are available for the report.

You can insert any of these new fields into your report by following the steps below:
- Select the section of the word document you want to insert the new field
- In the XML Mapping Pane
- Right-click the field you want to add
- Select Insert Content Control
- Select Plain Text
To remove a label or data field from the report, simply right-click on the field within the XML Mapping Pane and select Remove Content Control and delete the remaining text as needed.

You now have the tools and knowledge needed to customize reports to meet your unique business needs. You can either make advanced changes by adding and removing data fields or make simple changes by formatting the document as you would any other Word document.
Import your customized report back to Business Central
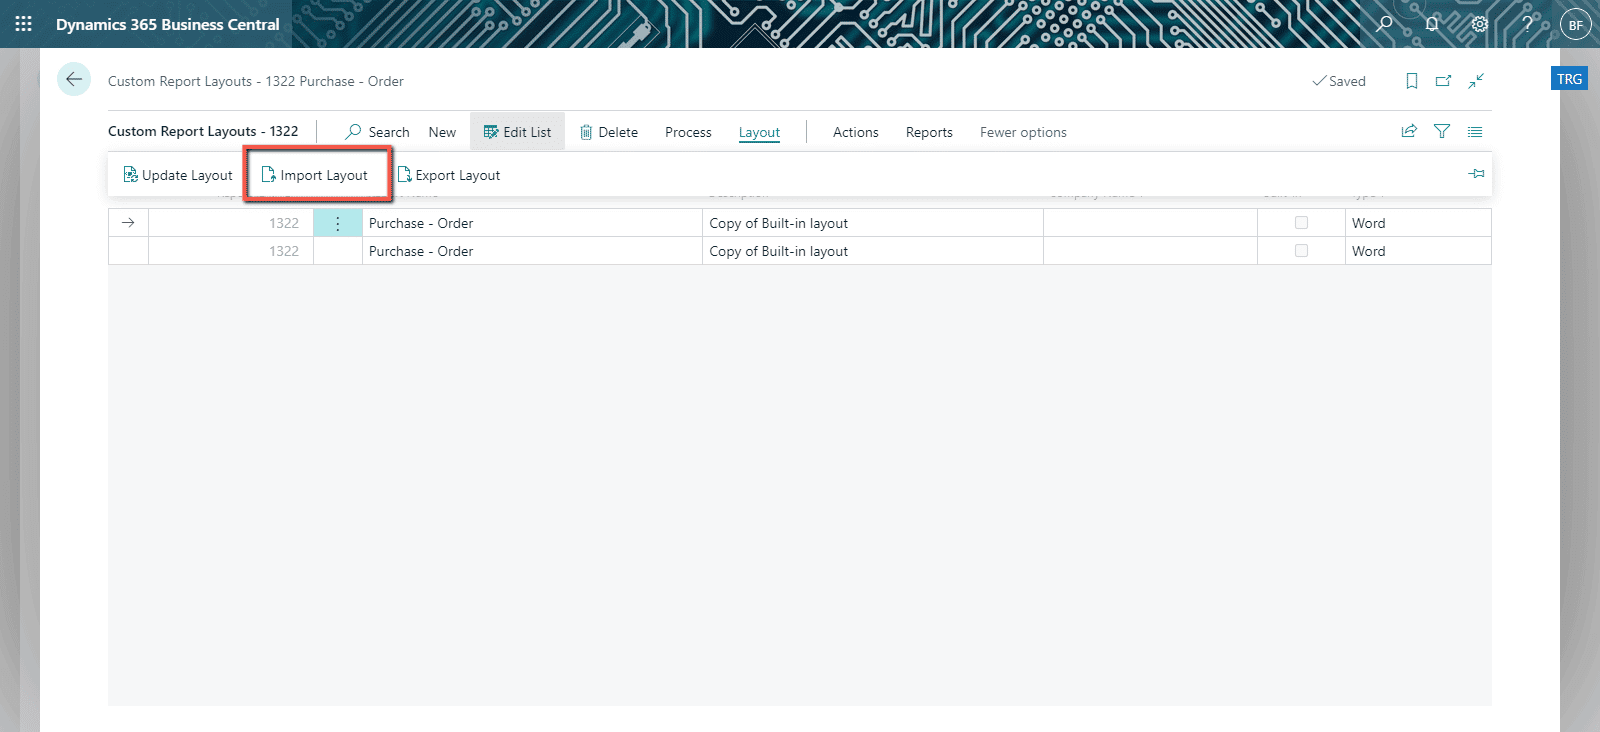
Once you have finished customizing your report to meet your needs, you will need to import the document back into Business Central. First, save your Word document and then open Business Central and follow the steps below:
- Search for and select Report Layout Selection
- Select the report layout you want to import your custom layout to
- Select Custom Layout
- Select Layout >> Import Layout
- Import the Custom Report Layout you created
All changes that were made will now be visible on the Custom Layout.

White Paper
How to choose the right support partner
The right support partner can help optimize your systems and provide guidance to make the most out of the available technology platforms, while the incorrect partner can put your business at risk. Read this whitepaper to learn the top 7 Criteria for Choosing a Support Partner.
Next Steps
From simple formatting changes such as changing the header to a different color, to adding additional fields to your report, you can customize your Business Central reports to meet the unique needs of your business. Small changes can make your reports look more professional and allow you to share relevant information easily. Additionally, customizing the XML part of documents can give you more freedom in how you want the report to look and what information it displays.
For assistance with more complex changes, contact our experts who specialize in customizing Business Central to meet specific business needs.