Dynamics 365
 Power Platform
 Dynamics
How to sync Master Data across companies in Dynamics 365 Business Central

Microsoft recently introduced an update to Dynamics 365 Business Central, in the 2023 release wave 1, that enables master data synchronization across selected companies. This new feature is included in the latest release of Business Central and is available for no additional cost. It allows businesses to keep selected Master Data synchronized with minimal user interaction, making it easier to onboard new companies or keep data consistent throughout the business.
Sync Master Data in Business Central
This new feature in Business Central allows users to choose what tables and fields need to be synchronized. A new Master Data Management Setup Page will provide several useful tools to ensure users are only synchronizing data that needs to be transferred. For example, in this new page, users will be able to:
- Enable synchronization between companies
- Select specific Tables to be synchronized and apply Filters
- Select specific fields within the Table to synchronize
- Run Full Synchronization for all selected Tables and Fields
- Set up Recurring Job Queue Synchronization
This new tool within D365 Business Central is encompasses hundreds of tables that can be synchronized. Users can create a synchronization setup to be as simple as updating Accounts within the Chart of Accounts, or as complex as updating Lot information for specific Items.
How to enable synchronization between companies
To enable the synchronization of master data between companies, follow the steps below:
- Search for and select the Master Data Management Setup page
- Fill in the Company Name to pull data from
- Toggle the Enable Data Synchronization field
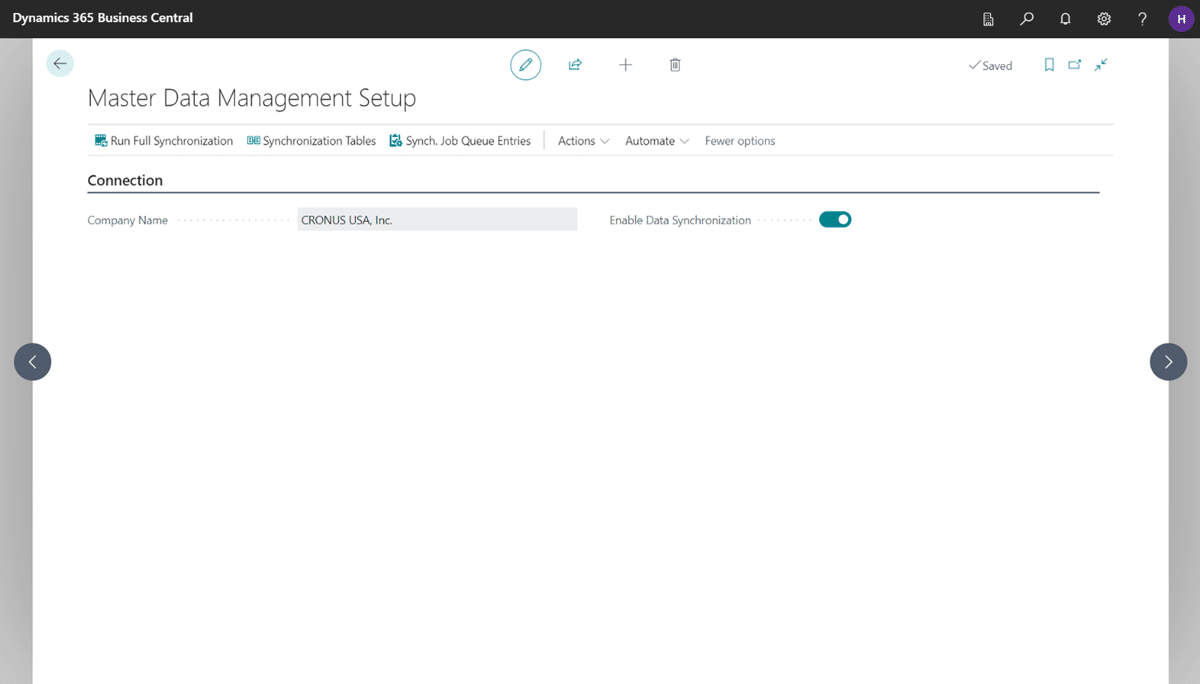
The company you are currently active in is now ready to start synchronizing data with the selected company. Once this feature is enabled, users can start synchronizing data between companies whether it be a full synchronization with multiple tables or by setting up a job queue to run periodically to update a specific table.
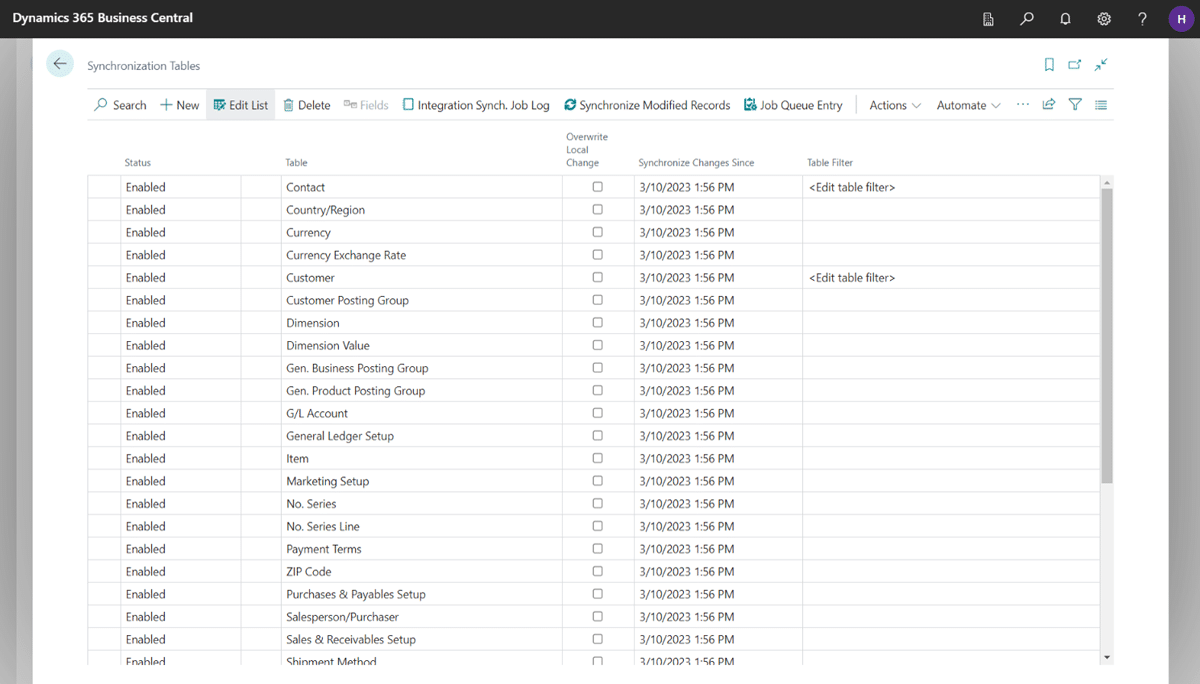
Select specific Tables to be synchronized and apply Filters
The Synchronization Tables page allows the user to Enable/Disable specific tables and apply direct filters to filter data that will be synchronized. Users can select Overwrite Local Change which overwrites changes in the local company since the last synchronization. To select specific tables and apply filters, follow the steps below:
- Search for and select the Master Data Management Setup page
- Select the Synchronization Tables button on the ribbon
- Enable and disable specific tables by using the Status column
- On a blank line, click on the Table field to add more Tables to synchronize
- Apply a Date/Time Filter to only Synchronize Changes since that date
- Apply Table Filters as needed to only synchronize specific data
Select specific Fields within the Table to synchronize
Users can Enable/Disable specific fields within tables to select exactly what data they would like to synchronize. To select specific fields within the table, follow the steps below:
- Search for and select the Master Data Management Setup page
- Select the Synchronization Tables button on the ribbon
- Select the Fields button on the ribbon
- Enable and Disable specific fields using the Status column or by selecting Enable All Fields/Disable All Fields
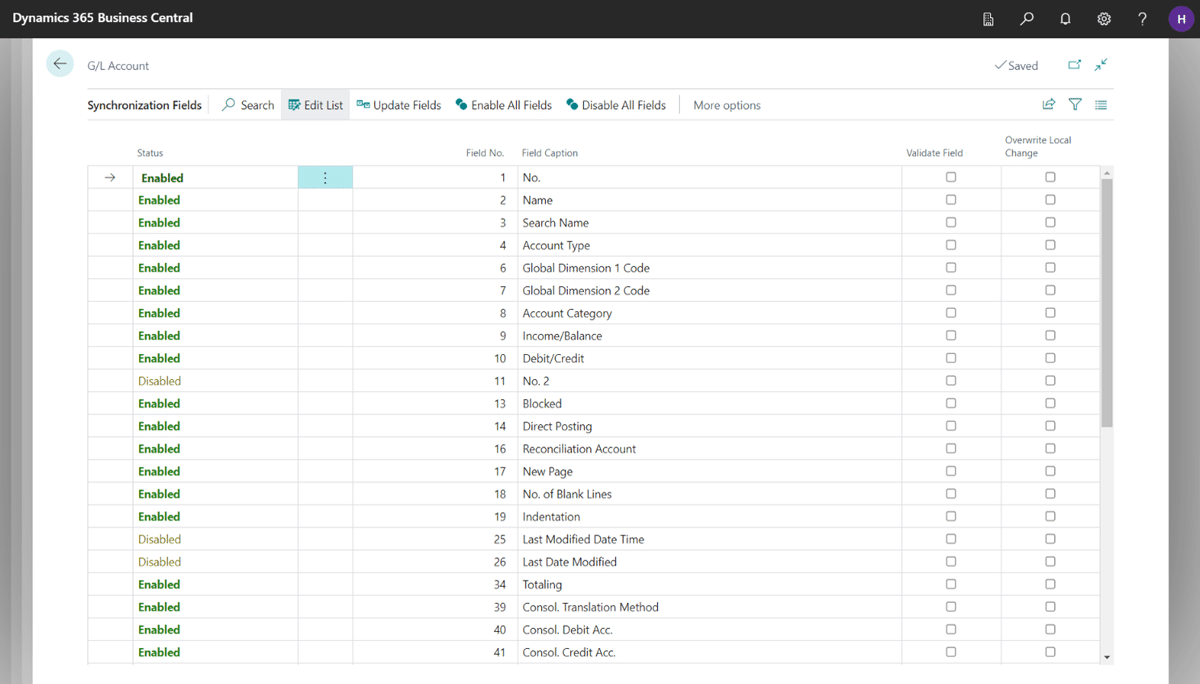
Once the specific fields and tables are enabled, the user now can synchronize them with the company selected on the Master Data Management Setup Page.
Run Full Synchronization for all selected Tables and Fields
Running a Full Synchronization is a great tool when setting up a new company with the same Master Data. To run a Full Synchronization, follow the steps below:
- Search for and select the Master Data Management Setup page
- Select the Run Full Synchronization button in the ribbon
- The Master Data Initial Full Synchronization page will pop up showing all tables that were successfully synchronized
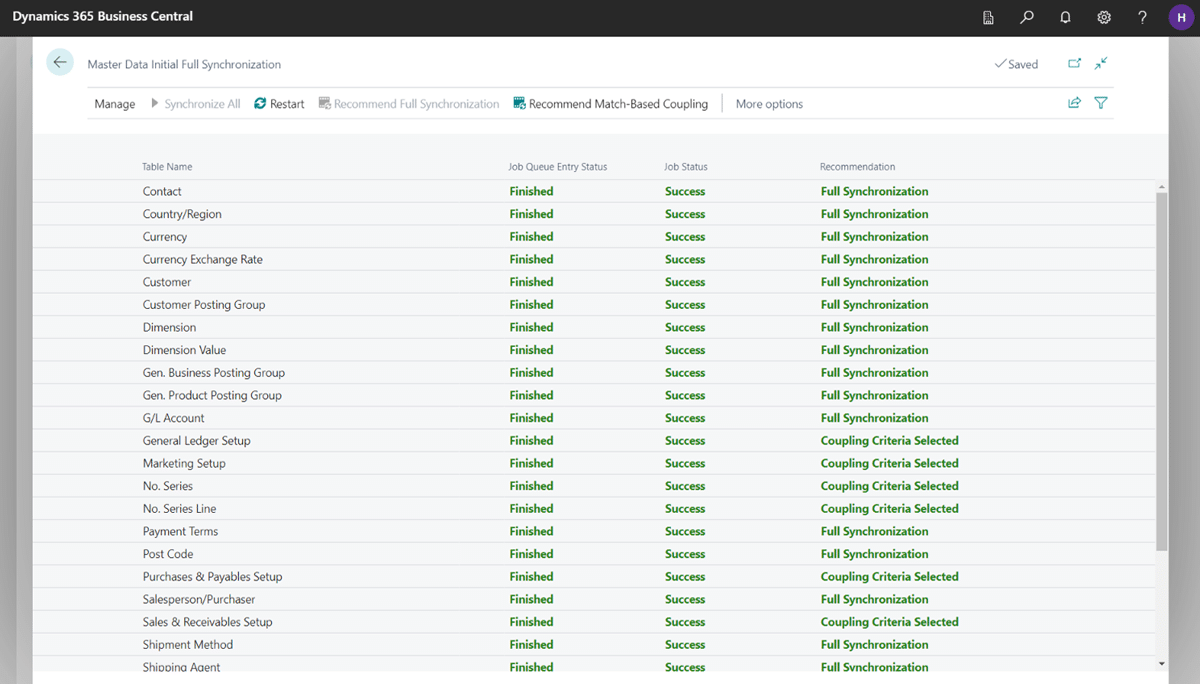
All tables and fields that were Enabled in the initial setup will be successfully synchronized. If there are any Job Queue Errors, the queue can be restarted to complete the synchronization. This function will not set up any tables to be synchronized periodically.
Set up Recurring Job Queue Synchronization
The final step is setting up a Job Queue, which will run the synchronization process automatically in the background based on the frequency that you choose. The Job Queue will automatically be created after running the Full Synchronization based on the filters and setup applied previously. You will need to specify the frequency of the job queue and enable it, which can be completed with the steps below:
- Search for and select the Master Data Management Setup page
- Select Job Queue Entries in the ribbon
- Navigate to the Job Queue associated with the table you are trying to synchronize by reviewing the Description
- Open the Job Queue and update it as needed to run on a specific schedule
- Click Home >> Set Status as Ready when the job queue is set up
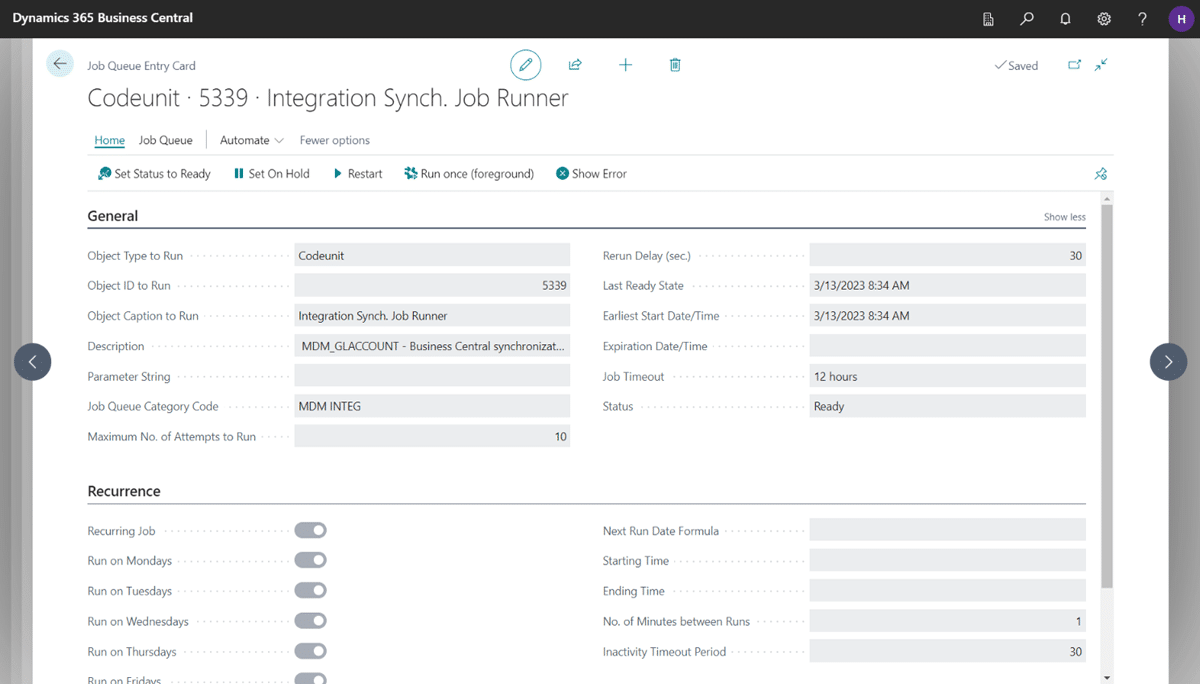
The Job Queue will now run as selected and Synchronization will occur for the table. As changes are made within the originating company, they will be updated in the current company as the Job Queue runs.

Extend Business Central to do more
Take your Business Central deployment to the next level with custom add-ons built by Rand Group. Our powerful applications are designed to optimize and enhance Business Central to meet the needs of your unique business.
Next steps
Microsoft’s new Master Data Synchronization feature in Dynamics 365 Business Central provides users with ultimate flexibility and ease of use. With this feature, users can select specific tables and fields to synchronize and apply filters to ensure that only relevant data is transferred. The ability to run full synchronizations or set up recurring job queue synchronizations ensures that data is consistent across multiple companies and eliminates the need for manual data entry.
This powerful tool has many benefits including reducing discrepancies and streamlining workflows. To learn more about this feature and how to configure and enable it, contact our team today. Rand Group is a dedicated Dynamics 365 Business Central partner that can help your team get the most value out of your business technology solutions.